
By Tara Taylor and Ramona Aston
Back in January, we were looking through seed catalogues and talking over our wish lists for the coming growing season. When we flipped to the gardening supplies section, soil blockers caught our interest. Initially we thought it would be worth attempting to make a homemade version, but as most simple DIY versions only created one block at a time, we decided the purchased soil blockers were the way to go, at least for the smaller sizes. We both decided to order some from West Coast Seeds.

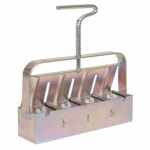
The basic premise behind the blockers is that they make small cubes of soil that can nest inside one another, minimizing transplant shock and making for stronger roots. It was less than straightforward to figure out which of the 7 different blockers to order, because the company gives them cute names like Micro 20 and descriptions that are maddening ”Blocks from the Mini 5 aren’t meant to receive blocks from the Micro 20, but they can be potted up into the big 4 inch blocks from the Maxi Blocker.” It took some figuring, but we each ordered a small Micro 20 and a medium Mini 4. If you want to transplant seedlings from the Micro 20 into the 2 inch blocks created by the Mini 4 make sure to order the Soil Blocker Insert. This insert creates a space in the 2 inch blocks to receive the 3/4 inch blocks from the Micro 20.

Originally we were going to skip the Micro 20 which creates twenty 3/4 inch blocks. Why plant in those tiny blocks if we were going to have to then nest those seedlings into the larger blocks? Why not just start out in the 2 inch blocks created by the Mini 4? Then we discovered that an amazing amount of seedlings can be started under lights using the Micro 20. Most of us have limited space under lighting when we start seeds and those blockers really maximise the space.
Recipe
This is a recipe by Eliot Coleman, the creator of soil blockers. We found that if you follow the proportions of soil mix to water that the blocks hold together very well.
Use a 10 quart bucket or mark off 10 quarts on a larger bucket.
- 3 buckets fine peat
- 1/2 cup lime
- 2 buckets perlite, or vermiculite, or coarse sand
- 3 cups fertilizer (equal parts blood meal, green sand, and bone meal)
- 1 bucket of garden soil
- 2 buckets of decomposed compost
- 1 part of water to every 3 parts of soil blocking mix
This recipe makes more than you will probably use the first time. Since it is easiest to mix the ingredients when they are dry, add the peat, lime, fertilizer, perlite or vermiculite, and dry garden soil into a tote. Mix well. This dry mix can then be stored and mixed up with water and compost as needed.
We used one bucket of dry soil blocker mix, to 1/3 of a bucket of water, and 1/3 of a bucket of compost. It is suggested to dry and sift the compost first, but it worked well to add the compost to the water, stir it to make a slurry, and then add to the dry mix (after picking out the worms). This made enough mix for three hundred and sixty 3/4 inch blocks, and enough left over to fill seeding trays for microgreens.
Making the Blocks
Making the blocks is quite easy. Plunge the blocker into your wet mix, rub it against the bottom or side of the tote to pack the soil in, press the whole blocker onto the tray and release the blocks. If your blocks stick, it helps to periodically rinse the blocker in a container of water.

We took a trip to Dollarama for some heavy duty cafeteria type trays, which work really well and will last for many more seasons than flimsy seedling trays or pots. If you would like to use seedling trays, parchment paper lining the bottom of the seedling tray will level out the ridges in the plastic tray, making placement of the small 3/4 inch blocks from the Micro 20 easier.
When you are putting the blocks on the tray it is important to leave space between the blocks. This makes it easier to move the blocks and to water them. To water the blocks, pour water into the space between the blocks. The blocks will then soak up the water. Allow the blocks to dry out on top (which they will do every day if they are under lights) and water every day. If your blocks can’t soak up all the water, pour off the excess. Allowing the blocks to dry out on top daily helps prevent mold and damping off.
Success!

After 3 weeks of using Micro 20 soil blockers, it is safe to say that they are a hit with these gardeners! Although their physical space seems limited in their tiny cubes, the plants are growing vigorously and are very sturdy. One of the perks of this system is that the roots naturally air prune which makes for stronger plants. We have both been able to start more seeds than we would have if we had used pots due to the spacing of soil blocks. Avoiding the flimsy plastic pots of past years is another bonus – nothing for the landfill with soil blocks.
In the coming weeks we look forward to moving some of our 3/4 inch blocks into the 2 inch blocks. After that we can’t wait to transplant our seedlings out, knowing that none of them will be pot-bound and that transplant shock will be greatly reduced. We also look forward to starting seedlings that normally don’t like to be transplanted.
Shopping Tips from Ramona:
I found my ingredients at Shar-Kare in Campbell River. I recommend their bales of peat moss because it is very fine. Campbell River Garden Centre has a great section for bulk amendments and I recommend that. They were closed when I bought my amendments and so I bought them prepackaged at Shar-Kare. Shar-Kare at that time only had slow release lime so I got quick release lime at Quadra Island Builders.
Tara Taylor is a long time Quadra Island resident who is passionate about a farm-to-table approach to growing food. She enjoys sharing her vision for a sustainable future as the proprietor of Quadra Roots. To find out more about her CSA and produce boxes go to https://www.quadraroots.com
Ramona Aston has a large vegetable and flower garden on Quadra Island that has been in a state of expansion for the last 8 years. Each year she swears this is the last year she will expand.
Editor’s Addendum: 5 days after this blog was posted, a great how to video was published on YouTube. Here it is:
Lilianne Langevin
Excellent blog ladies!!! Thank you for sharing this new way of getting seedlings started.
joan brears
I don’t know how I missed this post!! I have just been looking to invest in the equipment – thanks a lot – will you be doing any follow up with other tips and general commentary?
quadraislandgardenclub
I will ask the authors if they could do a follow up, great idea!
Jen Banks-Doll
I have been using soil blocks for several years now after reading this post. I have simplified the recipe and it seems to work. I use potting soil with peat and perlite in it and I use that to replace the peat, perlite, and garden soil. I also half the recipe. This is what I do:
– 3 10qt buckets potting soil with peat and perlite in it – divided into two totes.
– to each tote, add 2 Tbsp lime, 1/4 c green sand, 1/4 c bone meal, and 1/4 c blood meal
– mix each tote, then put all the dry ingredients into one tote
– in the second, now empty tote, add 1/3 bucket water and 1/3 bucket compost. Mix into a slurry.
– Then add 1 bucket of the dry mix from the first tote to the slurry. Mix.
– Use the wet mix within the next few days. The dry mix will keep indefinitely.