By Terry Phillips
So after reading Part 1, you’re ready to grow onions, but now you’re wondering what the best thing to start with is: seeds, sets, or starts? Let’s examine each option.
 Seeds
Seeds
Growing from seed allows you to know your variety and its day-length. If open-pollinated you can save your seed, selecting the best for your garden. You can start when you want and control growing conditions. For overwintering you can start extra early, like in July, when starts and sets are scanty to non-existent. You can try a few varieties that you might not find at a nursery. You can give the best nutrition right from the start and make it consistent. However, growing from seed requires some dedication.
How To Do It
Buy your seeds from a company that tests onions in Canada, preferably the west coast. Start seeds in February to mid-March. Not too early, or your plants will become pot bound and need to be potted up causing them stress. William Dam Seeds don’t transplant until April for the biggest bulbs. For more info, click here. Follow the planting instructions that come with the packet for best results.
I use gallon-sized pots for seeding onions as it gives more growing room before transplanting than typical 4” pots. I used to plant into a 3 part mix of compost, peat, and garden soil. But this is a heavy mix and the weeds and disease all contributed to poor success. I now buy organic potting soil for my seedlings. A gallon-sized pot can be half full of compost or soil before topping up with potting mix to save on the mix. If I need to pot up before planting out I use my own transplant mix (see recipe below) and use a 2 gallon pot. Try to provide even moisture, temperature, and lots of light to your seedling sprouts for the first six weeks which will take us into April transplanting time.
 Sets
Sets
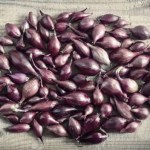
Sets are those tiny bulbs you buy in net bags in February and March (although sometimes not available until May) from Canadian Tire or from your nursery in bins. Chances are you won’t know the variety or day-length, but you can get a head start on the growing season, or catch up, if that’s the case. Warning: if they are short-day onions you will get bulbs too early. And remember, they may be rejects from commercial growers, or with residues of chemicals, or stored at uneven temperatures. The sizes of the bulbs are inconsistent. But they are easy to plant at a time when it is fun to be in the garden with a tank top, not rain gear and gumboots.
How To Do It
Buy your sets from a company that tests onions in Canada, preferably the west coast. The time to plant is around the end of March or early April when your soil is starting to warm up and no longer heavy and soggy. Wait longer if your garden is not well drained. Light soil is easier for onions to grow in and set roots into. Move aside your winter mulch. Amend the top 4 inches of your onion row with your favourite mix. Plant your sets with no more than 1” covering the top of the onion. Plant them 4-5” apart and in rows 12-18” apart. Re-cover with a light mulch. When the greens start to show you can begin a watering and side dressing regime. Don’t plant too deep as the onion bulb wants to be no more than a third into the ground once it forms. Some people say the smallest sets produce the largest bulbs and the largest sets are more likely to produce a flower stem than a decent bulb. However, I suspect that sets are graded to minimize this event. Another cause of ‘vernalization’, the premature flowering of a plant, is early cold weather during the growing season.
 Starts
Starts are the four-inch pots crammed with about 50 onion seedlings, or the bunches of seedlings pictured, and sold in garden centres too early in spring. You are usually assured that your nursery has chosen a variety suitable to your area. But if you can’t get them into the ground right away be prepared to pot them up into larger pots to ensure consistent growing. Otherwise they’ll bulb up in the little pots and never get any bigger. One problem is your nursery might be getting bored of the same old, same old and have tried a new variety this year. New and untried. Be the experimenter if you like. Or what happens if your nursery runs out of transplants just when you’re ready to get planting?
How To Do It
Buy your starts from your favourite nursery. The time to transplant them will be the same as if you grew them from seed. But chances are, you needed to buy them from your nursery before they ran out of stock and so you need to keep them several weeks before you plant them out in mid to late April. They will be in a 4” pot most likely. Once you are convinced that all the seeds in the pot have sprouted and are about 4” high I would pot up into a one-gallon pot. These seedlings are fairly tolerant of root disturbance and will easily grow more roots when disturbed. Fill the bottom of the one gallon with loose soil or compost. Fill the top with transplant mix (see recipe below). Make a hole in the top, tip out your 4” potted onions and gently place the block into the hole. Gently press into place. Top with 1/4” of potting mix to inhibit weeds. Water in, but don’t over-water. As with seeds, try to provide even moisture, temperature, and lots of light to your seedling sprouts for the first six weeks which will take us into April.
If the starts are more advanced, roots spiraling and coming out the bottom, white parts thickening and greens 6+” high it might be best to throw them away and not waste your time.
Conclusion
So have I cottoned on to that special secret yet? I don’t think so, or maybe in part. Stay tuned for Part 3 coming out in March where I will talk about how to keep those babies rolling and fattening.
In summary, after reading part 1 and 2, we can so far say: get the correct variety (long-day), plant at the correct time (not too early), into healthy soil (amended), and under consistent conditions.
With my new knowledge I’m off to the seed catalogues to find a good, hardy, storage onion seed for planting in the greenhouse sometime in February.
Terry’s transplanting mix
½ wheelbarrow sifted garden compost
1 40 litre bag organic steer manure (or ½ barrow sifted composted manure)
4 litres Organic alfalfa meal (nitrogen, phosphorous, magnesium, potassium, sulfur in a good balance for plants)
1 cup bone meal (phosphorous, calcium, iron, magnesium, zinc. Needs time to become available to the plant)
2 cups dolomite lime (has calcium & magnesium but needs a few weeks to become available to the plant)
2 cups kelp meal (60 minerals, elements, amino acids, vitamins)
½ cup magnesium sulfate (available immediately to the plant)
2 cups blood meal (optional. nitrogen available immediately, especially useful for feeding soil microbes)
In the past I have added rock phosphate, cal-phos, or green sand but I am moving away from these because of environmental issues related to mining and transporting these minerals.
Further resourcesWest Coast Seeds:
https://www.westcoastseeds.com/blogs/garden-wisdom/about-onions
Canadian Organic Grower Magazine:
http://magazine.cog.ca/article/rooting-for-onions/
Terry Phillips is a gardener on Quadra Island who has long strived to grow great onions.
Growing Storage Onions Part 3: Transplanting, Watering & Harvesting – Quadra Island Garden Club
[…] planting tips see my previous blogs on Growing Storage Onions – Part 1: Getting Ready and Part 2: Seeds, Sets, or Starts: How Do You Decide? And also be sure to check out West Coast Seeds’ 2020 Onion Planting Guide for the juicy […]
Growing Storage Onions Part 4: Interviews with Experienced Gardeners – Quadra Island Garden Club
[…] Part 2: Seeds, Sets, or Starts: How Do You Decide? […]